Recent Posts
Ethernet Setting of 80mm Receipt Pinter Thermal
Ethernet Setting of 80mm Receipt Pinter Thermal
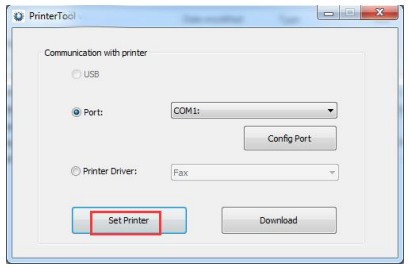
Double click tool“PrinterTool.exe” and the following screen will appear; After the printer is connected (Click to see how to connect printer by PrinterTool), Select "Set Printer" in the main screen.

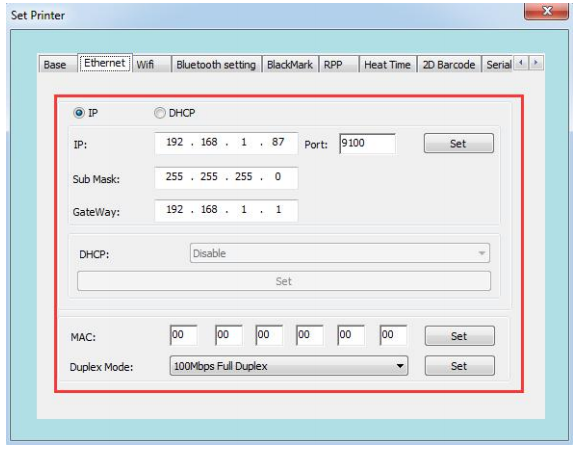
1. Set the IP address of the printer, change it to "192.168.1.87", and set the communication port
2. Set the printer's subnet mask and change it to "255.255.255.0"
3. Set the printer's gateway as "192.168.1.1"
4. Set the printer's DHCP function. The printer's DHCP is disabled by default. If necessary, it can be enabled to make the printer automatically obtain the address
5. Set the Mac address and set the network transmission rate.

Attention::Before setting the web address, if the printer is connected with one of following two methods: "One" uses the "Internet port", "Two" the IP address in the print driver mode. After changing the IP, the printer's IP address is changed. At this point, the printer is disconnected from the tool, and the IP address of the tool needs to be reset before connecting the printer. Other connection methods are not affected.
Copyright © 2026 Rongta Technology (Xiamen) Group Co.,Ltd..All Rights Reserved. 闽ICP备14000025号-1
