
Recent Posts
Network Port Setting and Test Page Printing of 80mm Receipt Printer
Network Port Setting and Test Page Printing of 80mm Receipt Printer
1. Set Receipt Printer Properties
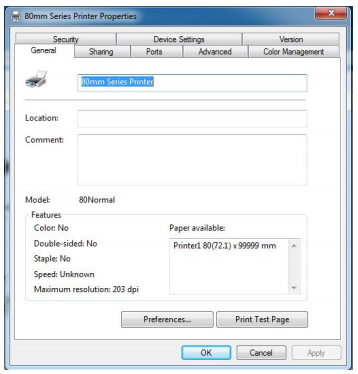
After installing the printer driver, view “Start”-> “Control Panel”-“Printer and Fax”-> “Printer Properties” of 80mm Series Printer. The "Printer Properties" window will pop up, as shown in the figure below:
2. Print Test Page via Network Port
Open the Printer Properties
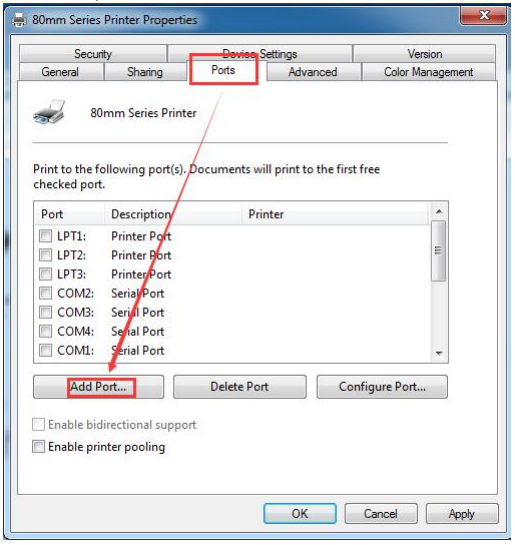
Select “Add Port ” as shown in the figure above.
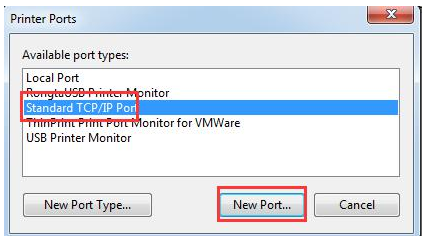
Select “New Port ...”, as shown in the figure above
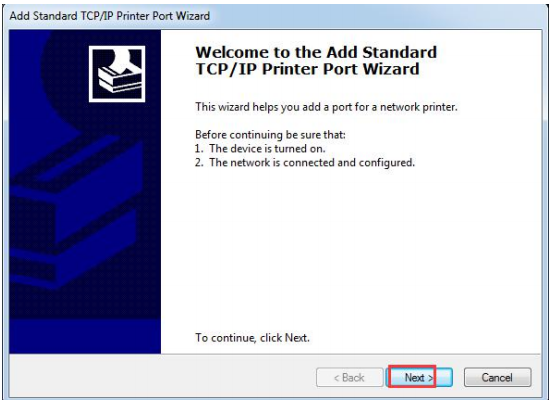
Select “Next ”, as shown in the figure above

Then enter “192.168.1.87” after the “Printer Name or IP address ”, and then select “Next ”, as shown in figure above
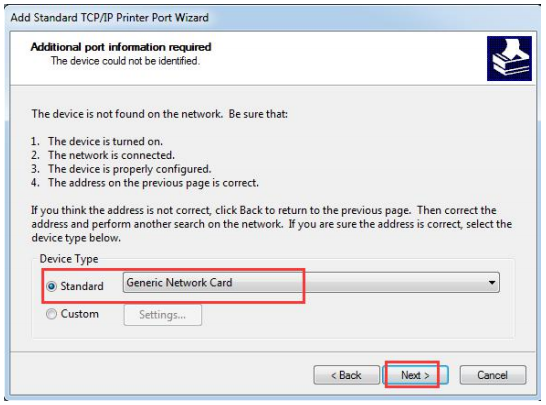
Then select “Next”, as shown in figure above
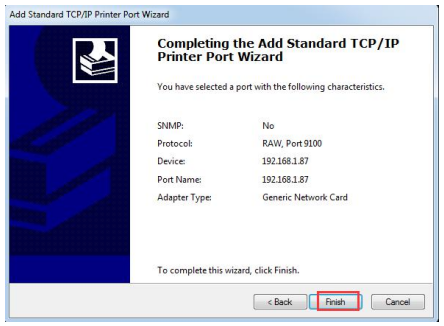
Then select “Finish”, that is, a standard TCP/IP port is added.
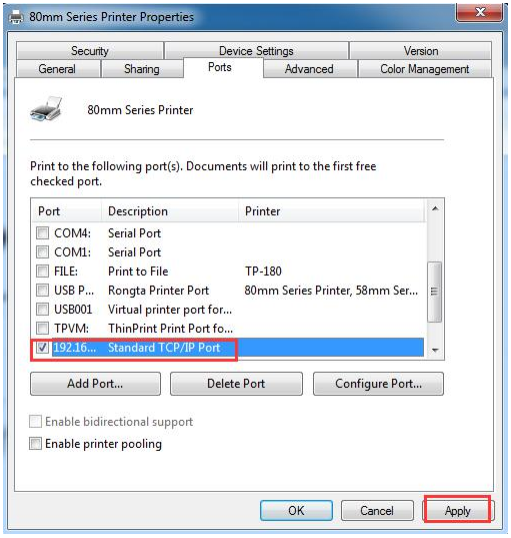
Select “192.16... Standard TCP/IP Port ”, then select “Apply ” as shown in the figure above, select “General” as shown in the figure below.
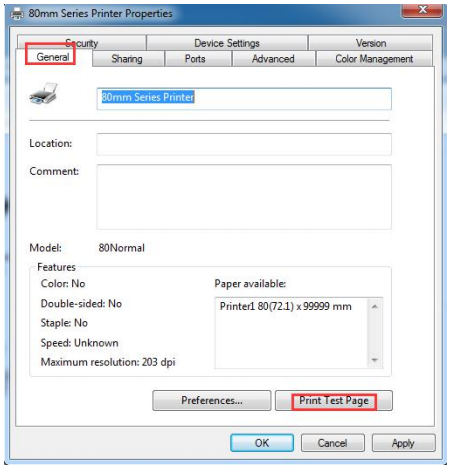
Select “Print Test Page”. If the test page can be successfully printed, it means the printer has been connected to the PC and configured correctly, and the printer port can be used normally.
Copyright © 2026 Rongta Technology (Xiamen) Group Co.,Ltd..All Rights Reserved. 闽ICP备14000025号-1
